TinyMS Reasoning Visualization Experience
Combined with OpenCV image vision library, TinyMS V0.3.1 focus visualization features. Through simple and intuitive image visualization, it helps users to understand the effect of model reasoning more quickly.
For users who do not want to write code, TinyMS provides a visual interface of WEB UI. Users only need to upload the image to be inferred on the browser page to experience easily. Currently, it supports for LeNet5, CycleGan and SSD300 models.
WEB UI reasoning visualization
Users need to deploy the visual server first, details please see TinyMS Nginx Verion Installation. After the server is successfully deployed, the home page and reasoning effect page (taking CycleGan model as an example) presented by the browser are as follows:
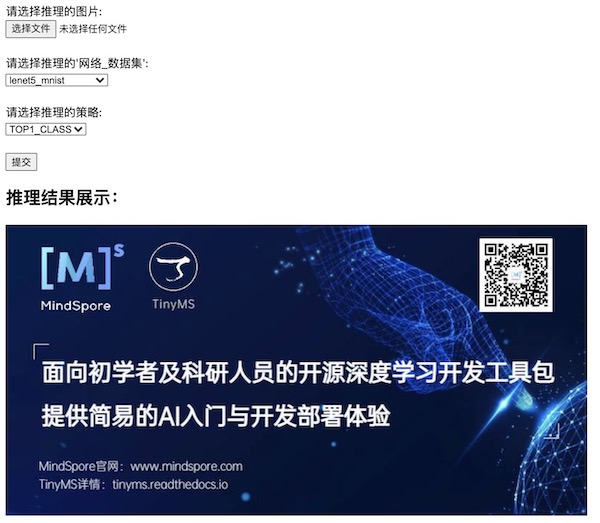 Index Page
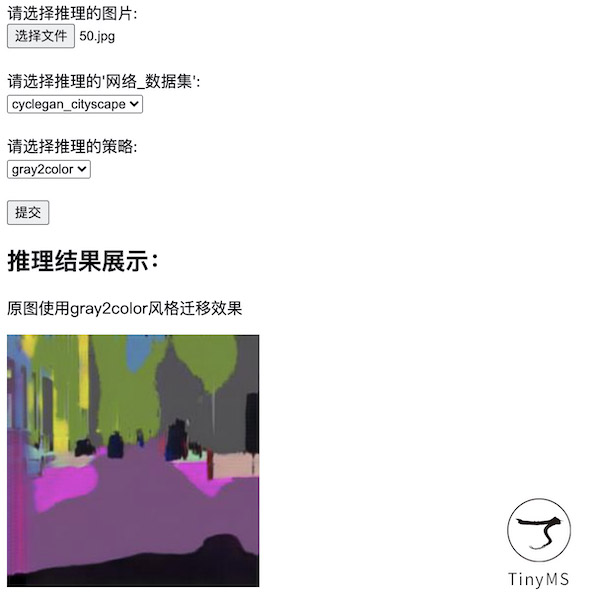 Predict Page
For users who want to run code, TinyMS provides model reasoning visualization module, which only needs 5 step code to experience quickly. Currently, it only supports SSD300 object detection model.
Model reasoning visualization module application
If users need to experience the model reasoning visualization module application for the first time, they can download code from TinyMS Official Repo, then do the following operations:
Static image detection
Environmental preparation
An operating system with a visual desktop, such as
Window_x64orUbuntu18.04
Experience the module application
# Download the TinyMS project
git clone https://github.com/tinyms-ai/tinyms.git
cd tinyms/tests/st/app/object_detection/
# Run static image detection
python opencv_image_app.py
The image to be detected and the image after inference are shown as follows:
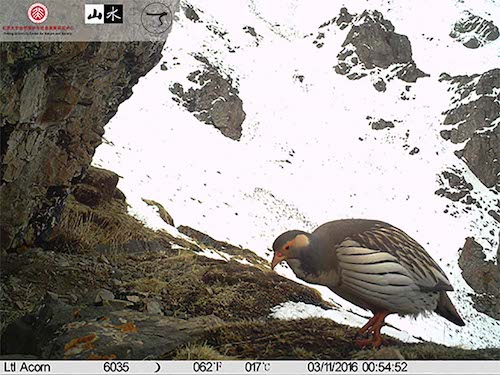 Input Image
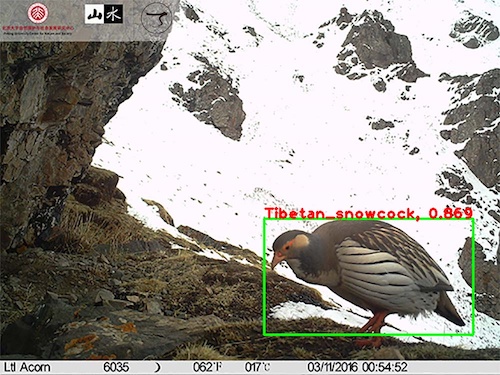 Reasoning Image
Real-time dynamic detection of video images collected by computer camera
Environmental preparation:
An operating system with a visual desktop, such as
Window_x64orUbuntu18.04Make sure the operating system can access the camera normally
Note:
Generally speaking, for the operating system under the host, such as
Window_x64andUbuntu 18.04, the camera can be accessed normally, but for the operating system under the virtual machine, please make sure that the relevant virtual machine services are enabled and the camera driver is connected. Following, we take the virtual machineVMware Workstationunder the window as an example:First of all, we enter the command
ls /dev/v*in the terminal to check whether there is a/dev/video0driver. If there is, it means it is normal, please ignore the following operations, if not, we will perform the following operations.Secondly, enable the relevant virtual machine services. enable the service
VMware USB Arbitration Servicein the windows host, that is, enterservices.mscon the keyboardWin+Rto find the corresponding service and enable it. After it is turned on, the virtual machine needs to be restarted.Then, connect the camera driver. On the menu bar of
VMware Workstation, clickVirtual Machine (M)=>Removable Device=>Camera Name=>Host Connection, and clickVirtual Machine (M)=>Settings(S)=>USB, selectUSB3.0.Finally, You can use
cheeseto test whether the camera can be accessed normally.
Experience the module application
For the different choices for operating systems and different choices for testing methods, we provide the following specific environment experiences, please verify in the corresponding environment, note that the following environments have all satisfy the two conditions for environmental preparation, which is very important.
If your host operating system is windows
If you test on the host
Environmental Requirements:
Operating system:
Window_64Environmental dependency:
Git+Python 3. 7.5+TinyMS 0.3.1+Microsoft Visual C++ 14.0 or greaterCommand line tool:
Git BashNote: For details about the environment dependency of VC++ 14.0, please refer to the notes under Pypi install TinyMS
Execute the following commands after the environment requirements are satisfied:
# 1.Download the TinyMS project in the container
git clone https://github.com/tinyms-ai/tinyms.git
cd tinyms/tests/st/app/object_detection/
# 2.Run dynamic video image detection collected by camera
python opencv_camera_app.py
If you test on a virtual machine
Let’s take the virtual machine
VMware WorkstationunderWindow_x64as an example. Please refer to the notes in the environment preparation for VM connection to the camera:Environmental Requirements:
Operating system:
Ubuntu18.04 LTS DesktopEnvironmental dependency:
Docker 18.06.1-ceCommand line tool:
Terminal
Execute the following commands after the environment requirements are satisfied:
# 1.Install xServer on the host and set permissions
apt install x11-xserver-utils
# 2.Allow all users to access the display interface
xhost +
# 3.Run container
docker run -it --rm --device=/dev/video0 -e DISPLAY=unix$DISPLAY -v /tmp/.X11-unix:/tmp/.X11-unix tinyms/tinyms:0.3.1 /bin/bash
# 4.Download the TinyMS project in the container
git clone https://github.com/tinyms-ai/tinyms.git
cd tinyms/tests/st/app/object_detection/
# 5.Run dynamic video image detection collected by camera
python opencv_camera_app.py
If your host operating system is ubuntu
If you test on the host
Environmental Requirements:
Operating system:
Ubuntu 18.04 LTS DesktopEnvironmental dependency:
Git+Python 3. 7.5+TinyMS 0.3.1Command line tool:
Terminal
Execute the following commands after the environment requirements are satisfied:
# 1.Download the TinyMS project in the container
git clone https://github.com/tinyms-ai/tinyms.git
cd tinyms/tests/st/app/object_detection/
# 2.Run dynamic video image detection collected by camera
python opencv_camera_app.py
If you use docker access
Environmental Requirements:
Operating system:
Ubuntu18.04 LTS DesktopEnvironmental dependency:
Docker 18.06.1-ceCommand line tool:
Terminal
Execute the following commands after the environment requirements are satisfied:
# 1.Install xServer on the host and set permissions
apt install x11-xserver-utils
# 2.Allow all users to access the display interface
xhost +
# 3.Run container
docker run -it --rm --device=/dev/video0 -e DISPLAY=unix$DISPLAY -v /tmp/.X11-unix:/tmp/.X11-unix tinyms/tinyms:0.3.1 /bin/bash
# 4.Download the TinyMS project in the container
git clone https://github.com/tinyms-ai/tinyms.git
cd tinyms/tests/st/app/object_detection/
# 5.Run dynamic video image detection collected by camera
python opencv_camera_app.py
Currently, the document is still being improved:smile:. If your environment is not in the above reference, after you try it, you still have problems, we sincerely invite you to submit your issues and pull requests in our community, and we will reply you as soon as possible.